
The Band Didn't Know they Needed mastering and ENDED UP SELLING THEMSELVES SHORT...HERE'S HOW6/28/2023 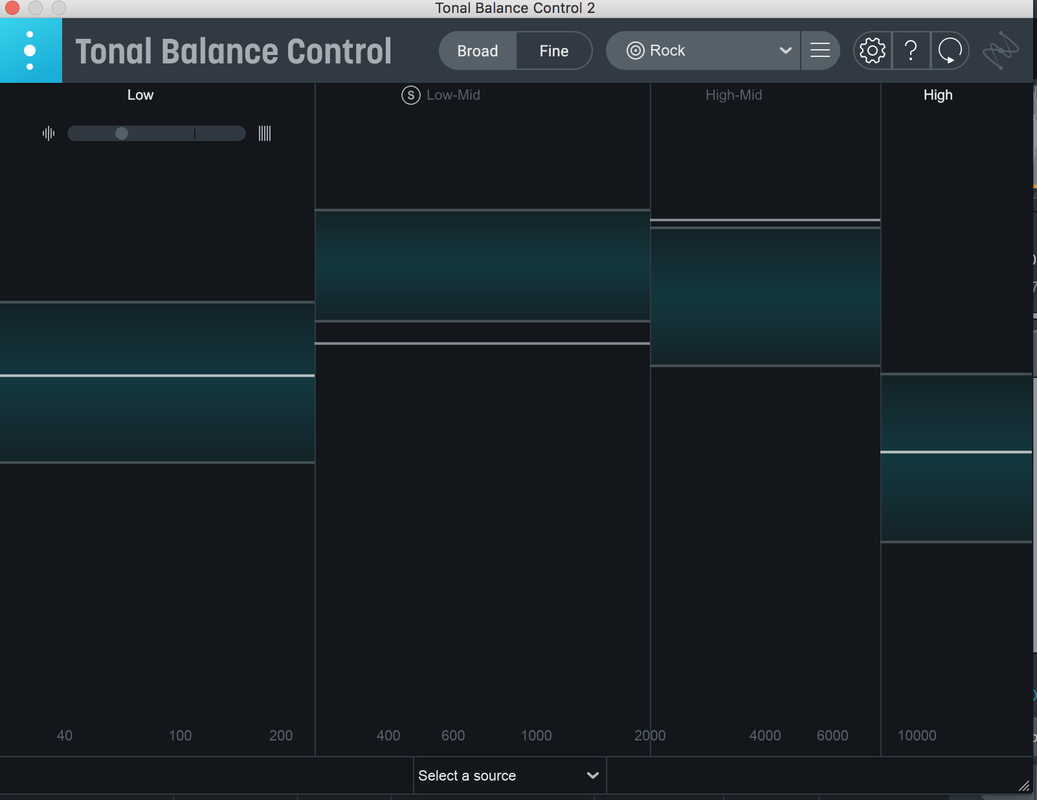 I was recently approached by a musician I was friends with in high school. His band had just recorded an album. He asked me if he could send me the tracks so I could tell him whether or not I thought the songs needed to be mastered.
I told him I didn't need to hear the songs to tell him that his songs should be mastered if he wants to do a professional-style release. Every single professionally-released album is mastered. If you want your recorded music to be presented professionally, mastering is NOT an optional step. So, he agreed to let me master his album. He sent me the files that his mix engineer sent him. They weren't mastered. But, they had what is referred to as "faux mastering" applied to them. Faux mastering is essentially using a limiter plug-in to raise the volume of a mix so that you don't have to turn your device up to maximum volume to hear and evaluate your mix at a reasonable volume. If you've been a long-time reader of this blog, you know that mastering is much more than just raising the volume of a mix. It's the critically important final step in improving the sound of your recorded music. Because the volume of these files was set at maximum volume (in the industry, called "zero headroom" or "peaking at 0.0"), they were not "masterable." Why? Well, because mastering involves boosts to certain frequency ranges (e.g., giving a mix more bottom end), you need headroom, otherwise you'll get clipping (a nasty sound). It's the sonic equivalent of smacking your head against a ceiling. So, the logical option for this band was simply to ask their mix engineer to remove/bypass the limiter plug-in and reprint their files, which would have the necessary headroom for mastering. When other band members got involved in the discussion, some were apparently uncomfortable with this and said they didn't know what mastering would do for them anyway. I explained what mastering would do and how using the faux mastered files for their release could be problematic. I am guessing it was a money issue, but they said they did not want to move forward with mastering. So, they chose to be stuck with using faux mastered songs for their release. Here are four reasons this will be problematic for them and why you may not want to make the same mistake. 1. Mastering improves the tone of the entire mix. In terms of tone, mixing focuses mainly on EQ'ing individual instruments while mastering EQ's the combined work. Almost every professional, national release has a different person master their music than the person who mixed it. A second set of professional ears can identify blindspots that someone who spent hours mixing just can't hear. With a quick listen of this band's mixes, I can hear a tone improvement opportunity. I can't share the music, but the screenshot from my mastering software at the top of this blog post visually shows what my ears heard: not enough low-mid "beef" and a little too much high-mid presence, which can sound harsh at higher volumes. That's not a criticism of their mix engineer. I know him and he always does a great job. It's just something that a second pro can bring to the table when mixing and mastering are treated as the separate arts that they are. I can mix and master, but I had an outside engineer mix my latest album for that very reason...to get the benefit of a second set of professional ears working on making my music sound its best. 2. Mastering optimizes music for streaming. One of the biggest concerns in mastering today is avoiding the "loudness penalty" that streaming services impose on songs. Streaming services strive to have all songs be approximately the same volume so that you are not unexpectedly blasted by a loud song after a quiet song and so that you don't have to constantly adjust the volume on your listening device. This is of particular concern for songs that are mixed/mastered too loud for today's streaming standards. Streaming services' technology will turn loud songs down. A lot of artists today strive to avoid having streaming services apply normalization or limiting to turn down their music to match other music because it changes the character of their music. Some artists can't tell, while others - one of my clients in particular - absolutely can and want to avoid it like the plague. The files that this band sent me were printed too loud and will absolutely trigger the loudness penalty. Their songs may not sound as good on Apple Music, Spotify, etc. as they do just by playing the WAV files on their computers. Because streaming is the #1 way that music is consumed today, I consider optimizing music for streaming to be of paramount importance. 3. Mastering applies compression and limiting to make your music sound smooth. A mastered song will allow nothing to jump out and sound unnecessarily loud, even for a fraction of a second, while also maintaining dynamics. In this example, the faux mastering did nicely tame the transients and provide a smooth listening experience. I can't criticize that. I do think dynamics were sacrificed a bit compared to real mastering. The soft parts weren't really that soft compared to the loud parts. But, dynamics are subjective and more experienced ears will hear them more than less experienced ears. Today, the importance of dynamics has been elevated again after the "loudness wars" of the early 2000's. If the band felt that the dynamic range was acceptable for their purposes, it is hard to argue that more dynamic range is better - even though, to professional ears, it certainly is. 4. Mastering allows your music to sound good even when converted. When WAV files (which are called a "lossless" format) are converted to a "lossy" format, such as MP3 or the formats that streaming services use, you can get audible distortion if your WAV files do not have enough headroom. The files that this band sent me peaked at 0.0 on the meter, which means they had zero headroom. Industry standards are to leave 1 dB of headroom (i.e., peak at -1.0) for these types of conversions to avoid distortion. So, the quality of the music from these files is likely to degrade if the band wants to make them available on streaming services or even if they want to email a song to someone. That being said, their files are absolutely fine for making CD's and having their fans download as WAV files from a service like Google Drive or Dropbox. I think that the biggest lesson from this example is that you need to have a plan for mastering early on in the production process. The band didn't tell the mix engineer that they had planned to send their album out to be mastered. So, the mix engineer assumed that delivering faux mastered files would be acceptable. Know your plan for mastering before your mix begins! Look, I understand that money isn't plentiful in original music. Everyone is looking to get their music out there as cost-effectively as possible. But, I'm firmly convinced that cutting corners on mastering - after you've taken the time and spent thousands on good recording and mixing - is selling yourself short. Mastering might be anywhere from 4% to 15% of your music production budget, but it's the delicious icing on the cake. You wouldn't serve cake without icing. Why serve your fans music without mastering? Planning to have your music mastered? Contact me at 412-600-8241 or beforeandaftermusicgroup@gmail.com!
0 Comments
 In my last blog post - "DIY Music Recording and Production: It Doesn't Have to Be All or Nothing!" - I offered some tips on how to decide what parts of the music production process you can/should handle yourself and for what parts you should look to a specialist for help. Those parts included tracking, editing, mixing and mastering.
The advice was all based on a self-assessment and whether you felt your skills were up to snuff on those parts. But, sometimes it can be hard to do a truly objective self-assessment. For example, for mixing, I wrote that you need skills such as EQ'ing instruments and voices, smoothing out musical passages using compression, and knowing how to use automation properly, among other things. But, how do you know if you're actually good enough at those things? Well, here's an approach you can take. Let's say that you're planning on releasing a 10-song album. You recently got a DAW like Pro Tools and have learned how to navigate around it. You are considering handling all of the production yourself. You record a song. You mix it. It sounds good to your ears. Maybe even better than you thought it would sound. But, major label artists pay hundreds of thousands of dollars to record, mix and master their music. It can't be this easy, right? Is there something that could be better about the sound of your album if you paid professionals to work on it? Well, there's one way to find out. Consider taking that song you've recorded and mixed yourself. See if you can find a recording and/or mastering studio to mix it and/or master it. You'll pay their rate. But, it will only be for one song, so it's not like you'll be paying a fortune or committing to having your entire album done. And the results will tell you a valuable story. You will likely arrive at one of the following conclusions:
Regardless of the outcome of this experiment, if you're truly interested in ensuring that you have a respectable recording of your music available to release, having one song mixed and/or mastered as a "test" is usually money well-spent. Before and After Music Group is happy to do one-off mixes and mastering, whether or not there is a potential for more songs to be mixed/mastered. Our rates are some of the most affordable, helping you not to invest too much in something that could end up being a "test." Of course, we think our work could end up being so impressive you have all of your music mixed and/or mastered by us! So, feel free to contact us to discuss the ideas you have for your music recording project. We'd be happy to share our thoughts on how you can get the most out of your DIY approach, while bringing in a professional where necessary to enhance it. You can reach us at beforeandaftermusicgroup@gmail.com or 412-600-8241.  When average musicians think about music recording and production, they think of two approaches: the professional approach and the do-it-yourself (DIY) approach.
The professional approach involves going into a well-equipped recording studio with an experienced, professional engineer for tracking, overdubbing, editing and mixing, then shipping off your mixes to an experienced, professional mastering studio for mastering. The DIY approach is where the artist does everything themselves using consumer-level hardware and software. The DIY approach is usually chosen to save money. The results are often - but not necessarily always - less impressive with the DIY approach. Today, I'm here to tell you that a hybrid approach is a valid third approach. It allows you to save money while not sacrificing too much quality. The key to getting the right balance of the DIY and professional approaches is to honestly evaluate what skills and resources are needed and what you have available to you, then choosing what you do yourself and what you leave to the professionals. Let's break down "music production" into a few of its phases and talk about the skills and resources needed for each phase. Tracking & Overdubbing Tracking and overdubbing are phases that require the least technical skill. And except for recording drums, they are phases that require fewer technical resources. For everything except drums, you will need the following skills and resources:
For recording drums, you will need microphones for each drum as well as overheads. Generally, you can get away with basic instrument microphones and stands/clips for each drum except the kick drum, which will require a kick drum-specific microphone. Overhead microphones are usually condenser microphones designed for that particular purpose. And, you need a room acoustically appropriate for drum recording. Some people choose to take a different approach with drums, either programming them using a software program or tracking them as MIDI. Some artists do all of their tracking and overdubbing themselves. Others do none of the tracking and overdubbing themselves. And it's not uncommon for artists to record their drums in a professional studio and do the balance of tracking and overdubbing in a DIY fashion. Editing Some aspects of editing, like making timing corrections, can be done within the bones of the DAW. Others, like vocal tuning, require third-party plug-ins. And, if you want a recording that is competitive with what comes out of pro studios - some may, some may not - you will need to do vocal tuning. So, in addition to what you needed for Tracking & Overdubbing, you will also need:
If you are taking a hybrid approach to music production, you can choose to editing yourself or send your recording to a professional for editing. I will say this...if the vocals require a little more TLC than just a nudge of a note here or there, having vocal editing done by an experienced professional will result in the vocals sounding a lot more natural. Mixing Mixing is where specialized skill and experience really separates professionalism from amateurism. Someone's first mix ever will not sound anywhere close to a mix done by an experienced professional. That's because a common misconception is that mixing is just balancing the volume of instruments and voices. It's much more than that. While mixing can be done within a DAW using built-in capabilities, here are the additional skills needed for a good mix:
If you've never mixed a recording before and want to publicly release a recording that is taken seriously yet still allows you to take advantage of the cost savings that a DIY approach offers, mixing is a smart place to start getting professionals involved. Mastering Even when a record label-caliber recording is done in a professional recording studio, it is usually sent to an independent mastering specialist for mastering services. The prevailing logic is two-fold: someone who specializes in mastering will be much better at it than someone who does recording but dabbles in mastering, and having a separate mastering specialist means that you will have two music industry professionals putting their talent to work to make your recording sound its absolute best. So, naturally, even if you've done tracking, overdubbing, editing and mixing yourself, it's to your benefit to have a professional do your mastering. In fact, I'd say that if you only have one process performed by someone else, it should be mastering. It's the last chance you have to make a sonic improvement to your music before it goes to streaming or physical product manufacturing. And, it's usually less expensive than vocal editing or mixing. You'll give yourself the opportunity to at least have one music industry professional contribute to the quality of your recording. If you want to do mastering yourself, you should know that DAW's are generally not designed to do mastering. There are some people who try to do mastering within a DAW with its built-in plug-ins. But, that's not really true mastering. Here are the additional skills and resources you need to do mastering:
Closing Thoughts Obviously, if money were no object, every musical artist would have the best producers, recording engineers, mixing engineers and mastering engineers work on their recordings. But, money is an object. So, some situations require a DIY approach to enable artists to get their music out there on a limited budget. Therefore, it's good to think through what you can accomplish yourself and, if you do have some budget available, where you might be able to afford a music industry professional to enhance your work. Before and After Music Group is a company that specializes in mastering. If you would like to have at least one outside company take your DIY project to the next level, we'd love to hear from you and discuss what we can do for your music. Contact us at beforeandaftermusicgroup@gmail.com or 412-600-8241!  There are a lot of variables that go into the cost of professionally recording and releasing an album. Whether you self-produce or hire a professional producer, how many modern production techniques you use, and how much perfection you seek in your takes all play a role and make it difficult to give you a one-size-fits-all number.
However, there are some commonalities in what I'd consider a "typical" recording process that can help you get on the dartboard, if not hit the bullseye, when estimating the cost of your next album. So, I will focus this article on a "typical" situation, giving you the caveat that mileage may vary in your particular situation. This approach assumes that you'll be recording with an engineer, but not a separate producer. A producer, in a professional sense, takes a very hands-on approach with the artist: co-writing and arranging songs, changing parts, rehearsing and coaching performances, etc. The compensation for that type of pro producer is usually quite high and, therefore, will not be a part of this calculation. First, let's talk about four variables that you need to get values for before beginning the calculation of your recording and release costs. Those are: A. Studio Hourly Rate (SHR): Most more professional studios will charge an hourly rate, many of which range between $50 and $75 per hour. If it's a studio where noteworthy national acts record, that rate can go way up. Some studios may only offer "blocks" of hours, like a half day/4 hours or full day/8 hours. In those cases, just divide the block cost by the number of hours you get to determine the hourly rate. We'll be doing a lot of multiplying by the SHR, so make sure you get actual numbers and don't assume what you'll be charged. B. Number of Songs (NS): This is simple - how many songs are you going to record? C. Number of Drum Days (NDD): In the recording of many albums, usually drums are tracked first and tracked all at once as opposed to the band laying down a whole song before starting a new song. One of the reasons for this is that drum set up takes a long time. We'll get to that in more detail in a minute. But, for now, focus on estimating the number of days you will spend recording drums. This may vary but, in my experience, five songs is kind of the maximum number of average-length songs for which you can track drums in a single day. So, even if you only are recording six songs, if you use five songs as the max per drum day, you will need two drum days. There is no fraction of a drum day...if you set the drums up, it's a full drum day. D. Number of Parts (NP): Now, you need to think of breaking down the number of parts your songs have. A drum track is one part. A bass track is one part. Each guitar track is one part. An overdubbed guitar solo is one part. A lead vocal track is one part. A backing vocal track where all members of the band sing at the same time is one part. If you have harmony vocals where three different band members will record three different parts separately, those would be three parts. Whatever instrument or voice needs to be recorded on its own track represents a discrete part for the purpose of this calculation. Now that you've determined values for these variables, you can start plugging those variables into a calculation. The calculation is a master calculation separated into sub-calculations for five of the phases of recording and releasing music: Tracking, Editing, Mixing, Mastering and Distribution. 1. The Cost of Tracking First, you need to calculate the set up time for the drums. For first time recorders, this cost can be an unpleasant surprise as it can often take around two hours just to set up the drums, get them mic'd, get them sound checked, etc. So, multiply the number of drum days by the studio hourly rate by two: NDD x SHR x 2. This is your drum set up cost. Next, understand that - in my experience - it takes around an average of a half-hour per part per song if you're reasonably prepared. If you're not, it can take much longer. So, let's count on you being reasonably prepared. So, multiply your number of songs by the number of parts by the studio hourly rate by 0.5 (i.e., a half-hour): NS x NP x SHR x 0.5 This is your parts recording cost. Add the drum set up cost to the parts recording cost to get your cost of tracking. Expressed algebraically, this would be ((NDD x SHR x 2) + (NS x NP x SHR x 0.5)) 2. The Cost of Editing Editing involves a lot of things. Taking noise out in the silence between parts, tuning vocals, quantizing drums and other things. In my experience, the average song requires about two hours of editing. (NS x SHR x 2) 3. The Cost of Mixing Mixing times can vary. I've witnessed professional mixing done in as little as three hours per song (for a full band) to as many as 10 hours per song. I will plug three hours into the formula. Ask your recording engineer for the typical amount of mixing time he/she/they spend and use that number instead. (NS x SHR x 3) 4. The Cost of Mastering Mastering costs can vary wildly. The mastering studios that major labels use can run thousands of dollars per song. The mastering studios that indie labels and independent artists use will typically run between $50 and $150 per song. Before and After Music Group's mastering services, are on the lower end of that price scale but the upper end of the quality scale. As I've written about before, there is a huge benefit to identifying your preferred mastering studio BEFORE you even begin recording. So, reach out to a mastering studio sooner rather than later and learn your price. (NS x Per Song Mastering Cost) 5. The Cost of Distribution There are several digital music distribution service providers out there who can get your music on Spotify, Apple Music, Amazon, etc. Their prices are often in the form of a per-album fee or an annual subscription. Per album fees can be lower but, if you are planning several releases in the same year, an annual subscription may make more sense. There are other differences, so I encourage you to research the many options and go with the one that fits best with your objectives. Because both per album and annual subscription rates top out at around $30 (US), just use $30 for the sake of calculating the cost of distribution. The Master Calculation You need to add the costs of Tracking, Editing, Mixing, Mastering and Distribution together to come up with an estimate of the total cost of your project (not including the manufacture of physical products like CD's or vinyl). Combined together, the calculation (in US dollars) is: ((NDD x SHR x 2) + (NS x NP x SHR x 0.5)) + (NS x SHR x 2) + (NS x SHR x 3) + (NS x Per Song Mastering Cost) + 30 Because many musicians don't release how long it takes to set up drums, or how long it takes to track a three-minute song, or how much editing is involved, this calculation may make it seem like it is more expensive than anticipated to record and release an album. But, hopefully, having this calculation - put together after lots of experience - will enable you to more accurately estimate your costs and avoid unpleasant surprises. Before and After Music Group specializes in music mastering. We'd love for you to consider us to help get your music to reach its sonic potential. Contact us!  Before you enter the recording studio, you should do a quality control check of sorts on many aspects of the songs you are recording. Today, we'll explore how to do such a QC check on your lyrics.
Lyrics are often written hastily. Whatever comes to you in a stream of consciousness is what goes down on paper. Because lyrics often have the least repetition of any of the parts of the song, lyrics are often the last component to be completed. This can put pressure on the lyricist as you can't have a complete song without complete lyrics. As such, sometimes the first draft of lyrics are less than perfect. And that's OK. However, before you cast your song into proverbial stone in the recording studio, you should carefully review your lyrics and, if necessary, rewrite them to make them perfect. Here are some questions to ask yourself that can help reveal ways to improve your lyrics. 1. Does every line make perfect sense? Obviously, when we write our first draft of lyrics, they make sense...in our own heads. We know what we are thinking. We have an idea of the context. We are assuming certain things. But, without what is in our heads, a different person may not have a clear idea of the story. Look at every line. Would each line make sense to someone reading or hearing it for the first time? Are you missing details that would help you tell the story better? Does anything sound lazy, like you just picked that line because it fit and not because it is the greatest line possible for that part of the song? Asking yourself these questions - and answering them honestly - can help you infuse your song with better lyrics. Even if you only improve one line from your original version, it can make a big difference to listeners and help your song be positioned for greater success. 2. Is your listener expecting a rhyme and you disappoint them? Music styles changes throughout the years and decades. The most popular songs today sound nothing like the most popular songs from the early 1960's. However, one thing that hasn't changed is the fact that the most popular songs all have rhyming lines. It's expected. Sometimes, an amateur song will set up the listener to expect a rhyme and fail to deliver that line. Imagine something like "Roses are red/Violets are blue/I am in love/In love with her." You were expecting "In love with you," right? So, when the lyric said "her" instead of "you," you had an unmet expectation that felt upsetting. Don't give your listeners this feeling! Spend the time, find a rhyme. 3. Are your rhymes too predictable? There's something called a "perfect" rhyme, where the entire ends of two words rhyme and the only thing that's different is the beginning sound of the two rhyming words. From our last example, that would be "blue" and "you." That's a perfect rhyme. But, in modern music, over-reliance on perfect rhymes is frowned upon. It is regarded as more creative to use "imperfect" rhymes as perfect rhymes can be too predictable. This is where the two rhyming words share a vowel sound, but may have other sounds that keep them from being perfect rhymes. Examples of imperfect rhymes would be rhyming "me" with "beat," or "slay" with "tame," or "beach" with "treat." Hopefully, you get the idea. As an example, let's say that you've written the line "Twinkle, twinkle, little star/How I wonder what you are." You are using a perfect rhyme scheme and it sounds a bit predictable. You want to convey the same message, but wish you had an imperfect rhyme. You could rewrite it as "Twinkle, twinkle, little star/You have me so in the dark." Not exactly a Grammy-worthy lyric there, but it's just to illustrate how using imperfect rhymes can open creative doors and make your songs less predictable. Embracing imperfect rhymes can help you avoid being boxed in and unable to tell your story well because you feel you have to be obedient to the perfect rhyme scheme. 4. Are your rhyming rhythms too predictable? Rhyming rhythms can be predictable, too. When you have rhyming words on the same beat of their measures, your lyrics can sound dated. Modern music often has rhymes on different beats. Using the "Twinkle, Twinkle" example, here's how you can change things up a bit. If you want your second part to be longer than your first part, you can subtract syllables from your first part. Like, instead of singing "twinkle" twice, sing it once, keeping the same rhythm thus moving "star" from beat four to beat three and having a quarter rest on beat four, such as: Twinkle little star How I wonder what you are "Star" will be on beat three of its measure and "are" will be on beat four of its measure. You could also leave the first line alone and modify the second line similarly by subtracting two syllables and, thus, having "are" fall on beat three with a quarter rest to follow: Twinkle, twinkle, little star Wonder what you are Another idea is to add one syllable/one eighth note to the second line, thus placing the rhyming word on the "and" of beat four, as in: Twinkle, twinkle, little stars How I wonder what you dudes are So, there are three very quick examples of how a very small tweak can make your lyrics (as well as your melodies) sound less predictable and more modern. 5. Can you convert something simple sounding into something more creative? Plain words are fine in speech when you are trying to convey a message. But, lyrics should be more creative. They should express an idea in a way that no one has heard before. For example, you could write "You've ended relationships with a lot of people." And your audience may relate to that sentiment. But, it's kind of boring. Christina Perri's "Jar of Hearts" is a great example of how to take a boring sentiment and make it exciting, new sounding, and very visually-oriented: "Collecting your jar of hearts/And tearing love apart." Another example is "Black Vultures" by Halestorm. The song expresses the theme of "I will prove my critics wrong." But, that would be a bit pedantic if the band sung those exact words. Instead, they sang: Black vultures, circling the sky Pick at the pieces Scavengers wait for me to die But I'm not defeated Again, way more interesting and very visual. Plus, did you notice the imperfect rhyme scheme? Halestorm rhymed "pieces" with "defeated." Cool! Planning Ahead I hope that these tips helped you to discover ways to improve your lyrics and make them the best they can be by the time you put them down in the studio. As you plan your recording and release strategy, you'll eventually need mastering between the time that you finish mixing in the recording studio and the time that you submit your music for digital distribution. Before and After Music Group is a professional mastering studio that would love to help your music reach its sonic potential. It's never too early to decide who will master your recording. Whether it's just to ask questions or to take the final step in securing mastering services for yourself, we welcome you to contact us by email at beforeandaftermusicgroup@gmail.com or by phone/text at 412-600-8241. Best of luck getting your music prepared for the world!  Back when my band and I were recording the Chip DiMonick "Not Yet Rated" album in 2007, the recording engineer/owner of the recording studio asked us, "Where are you guys getting this album mastered?"
Huh? Our album needs to be mastered? What's that? And don't you do that here? Those are among the questions that flooded into our heads. (This was years before I did any music production/recording/mastering myself) It was a decision we weren't prepared for. So, we asked the engineer who he'd recommend. He recommended a guy in Chicago. Upon investigating the guy's website, it sounded like he specialized in mastering for vinyl records. And, in 2007, we had no interest in doing a vinyl pressing of our album. But, if our recording engineer had experience with him, we figured it would work out OK. We didn't really know what mastering did, so we didn't know who else might be better. Well, we started learning about mastering soon thereafter. After we sent in our unmastered recordings, we got back our mastered recordings. Something was very weird. On the songs we tuned down to C# on, we couldn't hear the low C#'s. "Is this even possible or are our ears playing tricks on us?" we wondered. I called the mastering engineer. He said that, because of the reference track we sent him - "Dead" by My Chemical Romance - he thought we'd want that C# eliminated so he cut that frequency. Still to this day, I have no idea why he would have thought this was a good idea. But he could restore it in a revision. And he did. The C# was back, but we still didn't exactly know how to evaluate how good the mastering was. Being 2007, this was during the peak of what was called "the loudness war," where mastering engineers competed almost exclusively on how loud they could make a recording. So, we put the master CD in back-to-back with our friends' CD. Theirs was louder. So, we asked the mastering engineer to make ours louder. He did. Without advising us what we'd be sacrificing in quality for loudness. But, not really knowing anything about mastering other than it can affect volume and take notes/frequencies right out of your songs, we were "satisfied." In hindsight, we could have done so better. The decision on who to master our album was ours. But, we were unprepared for it and were willing to blindly choose a mastering engineer just based on our recording engineer's recommendation (which could have been based on a kickback for all we knew). It's a regret. It's not 2007 anymore. The loudness war has been over for years. Streaming allows you to evaluate virtually unlimited examples of independently produced music. Yet, musicians STILL treat the mastering decision with the same ignorance and apathy as we did back then. In my post from a couple of weeks ago, I wrote that "because mastering is the last thing done to improve the sound of your music...it is a process that you should take seriously." I wish I someone gave me that advice 15 years ago. Careful consideration isn't just necessary when your recording engineer suggests a mastering studio. It's also necessary when your recording engineer suggests doing your mastering himself/herself, which is a topic all unto itself! I'll post on that in the near future. But, if you have the knowledge that mastering is a separate and necessary part of music production and the insight to know that you should choose the best mastering studio for your needs, we'd appreciate you considering Before and After Music Group's mastering services. Email us at beforeandaftermusicgroup@gmail.com or call/text us at 412-600-8241. 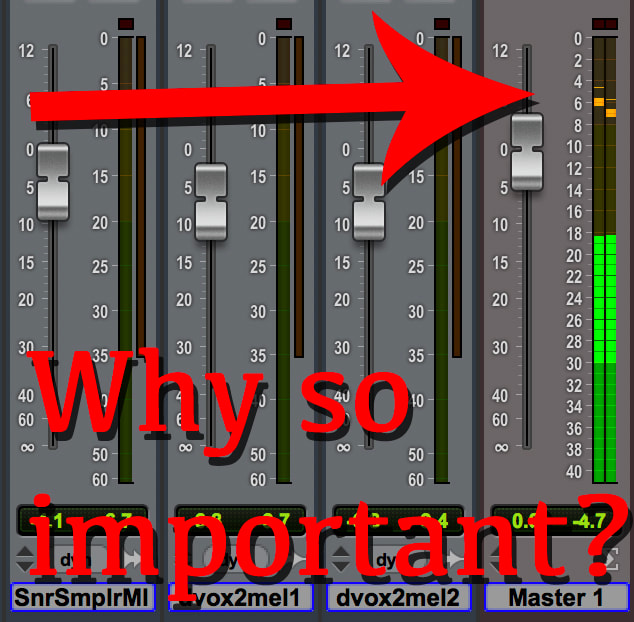 As I wrote in my post "9 Steps for Releasing Your Music," mastering is "the final – and critically important – process in getting your recorded music to sound as professional as possible." It is preceded by mixing, which is preceded by editing, which is preceded by overdubbing, which is preceded by tracking.
So, it's natural to think that selecting a mastering studio doesn't need to be done until you are done mixing, or close to it. But, it's actually not smart to wait that long. And the reason isn't obvious unless you know a little technical tidbit about recording. Fortunately, that technical tidbit is relatively easy to understand, even if you're not an audio professional. So, here goes... Mastering studios will have preferred or required characteristics of mixes that help them make the greatest improvement in your music. One of those is "headroom." In digital recording, you have meters that show the volume of each vocal or instrument channel. You also have a single meter showing the volume of the mix - where all instruments are combined into a stereo channel representing left and right speakers. The channel for this meter is called the "master bus." These meters generally light up green (from the bottom to the middle of the meter and denoting acceptable volume), yellow (from the upper-middle to the near-top of the meter and denoting closeness to too loud), and red (the top of the meter and denoting definitively too loud). When a meter hits red in a digital recording, there is an unpleasant sound, kind of like a click, which is called "clipping." There are numbers alongside the meter which rise from negative numbers to 0. The point where clipping occurs is 0dBFS, which means 0 decibels full scale. You always want every channel and the master bus below 0dBFS. The distance between the loudest part of a signal during a song - the "peak" - and 0dBFS is called headroom. Most mastering studios will ask for a certain amount of headroom. For example, we - Before and After Music Group - ask for 3-6 dB of headroom. This means that the loudest part of your song should ideally not rise above -6dB on your studio's master bus and definitely not rise above -3dB on your studio's master bus. If you're curious why headroom is needed, it's to ensure that clipping is avoided in mastering, too. When a mastering engineer makes improvements to your recording - like boosting frequencies to give a recording more nationally-competitive bottom end or simply raising the overall volume of your recording after compressing it to an optimal dynamic range - that can push a recording closer to clipping. The more headroom we mastering engineers have to work with, the more improvements we can make without being slaves to the possibility of clipping. Still unsure what that has to do with selecting a mastering studio early? Well, when recording engineers begin a mix, they should have the target levels in mind. For example, I start mixing by dialing in the drums. If I know I have to leave 6dB of headroom, I will set levels for the drums so that - when soloed - they peak at around -11dB on the master bus. I know from experience that adding the other instruments in a standard rock song will add another 5-ish dB to the mix volume. So, when I have dialed everything else in, my mix should peak around -6dB. Some experienced recording and mixing engineers even "mix as they go." This means that, once the drums are tracked, they will set their faders to peak at a certain level so they are kind of "partially mixed" as other instruments are being recording on top of them. Therefore, it can be extremely helpful for your mixing engineer to know this before beginning a mix or, possibly, even beginning recording. If the mixing engineer doesn't know this up-front, s/he might complete an entire mix only to later learn that it doesn't jive well with the mastering studio's specs and that could result in more work to be done. For you, the musician, the client, that could mean more money spent unnecessarily. Don't let that happen. Decide on your mastering studio early. Get their specs. Share those specs with your mixing engineer before the mix begins. And let your mastering studio do the best job it can with improving the sound of your recording thanks to having a mix prepared ideally for them. Before and After Music Group would love to be selected as your mastering studio. If you want to ask us questions about mastering or get some guidance on how to navigate the music production process to get the best sounding final product for your music, contact us at beforeandaftermusicgroup@gmail.com or 412-600-8241. “We’re gonna release an album this year!”
How many bands say this? It has to be millions, right? And how many of those bands have all of the steps of their album release planned out in advance? I’d guess a very small percentage. But it shouldn’t be that way. It doesn’t have to be that way. Knowing what the steps are in the music release process and planning them have tremendous benefits for a band, including:
STEP 1: SONGWRITING (& REWRITING) Obviously, before you record music, you have to create it. To many bands, writing a song is something that is done in one session. And, undoubtedly, many hits throughout the years were recorded where the melody, lyrics, music, etc. were exactly the same as first day the songs came into existence. But, for most songs, there is room for improvement after the first day. What’s the best part of your song? Maybe it’s the riff. Maybe it’s the chorus. Maybe it’s the opening line. What can you do to make every part of the song that good? There’s probably something you can improve. So, don’t think of songwriting as an activity that takes place in one hour then you’re done. Allow yourself time to craft your song. To challenge yourself to make it just a little bit – or a lot – better. Don’t rush the songwriting process. Allow yourself time to make each song the best it can be. STEP 2: REHEARSING When musicians think of releasing music, their thoughts will drift to the recording studio. Ah, isn’t it alluring to think of being in a studio, surrounded by gear that is too complicated for you to understand, and being on the precipice of making history? Sure. The studio is a place to make history. It is not a place to figure out what you are going to sing or play! Studio time can be expensive – $60, $75 or even more per hour. So, you want to make efficient use of your time. Figuring out the notes you sing on a part or how you will play a guitar solo is not something you want to be doing while the proverbial meter is running. Know what you’re going to sing or play once it’s your turn in the studio’s live room or isolation booth. Rehearse your parts so that they are so second nature that you’re likely to nail them perfectly in just one or two takes. Then, the time you spend in the studio will simply be executing what you’ve prepared. It’s expensive to do it any other way. Not to mention that the results could be disappointing if you don’t go in prepared to kill it. STEP 3: PRE-PRODUCTION Pre-production is kind of a mysterious term. That’s because only professional musical artists and serious amateurs do it. If you want to be serious about getting the best recording you can, you should include pre-production activities as part of your music release process. Pre-production involves all activities associated with tying up all loose ends prior to going into the studio. It’s when you make sure that your songs and your musicians are ready for the tracking step. Ideally, the pre-production step will end with you having a home demo of your songs. Here are a sample of some of the things you should hope to accomplish in pre-production.
STEP 4: TRACKING (ALLOW 2+ HOURS PER SONG + SETUP TIME) At this point, you are in the studio. Finally! The tracking phase is where each musician – sometimes simultaneously, often individually – records his or her primary part of each song. If you engaged in pre-production activities, not much should be a surprise here, but merely a matter of execution. If you did not engage in pre-production activities, there may be many surprises. One key thing to be prepared for is that, if you have a good engineer/producer tracking your project, you can expect feedback on your performance as you track. Maybe the engineer heard a vocal line that was delivered with too little confidence, or a guitar part that had some string noise, or a drum fill where the rim of the drum was hit, or some other subtle imperfection. A good engineer will ask you to re-record your parts when he or she feels you can do better. That’s OK. No need to get frustrated. The more takes you do, the more likely you will end up with one that’s perfect. That’s important. You will have to live with your best take for the rest of your life, so it’s good to have multiple takes from which to choose! Finally, be aware that you don’t have to do a whole take from the start of a song until the end. You can “punch in” to fix errors in the middle of a song while keeping the good parts of your take. The amount of time it takes to track a song varies tremendously based on the number of instruments and voices involved and how many takes each musician requires to nail their parts. Don’t be surprised if it takes each musician a half-hour or more per instrument/voice per song to track a song. Also, don’t be surprised if it takes two hours to load in and mic the drum set. Depending on the studio, you may be charged for this time. If the studio charges, factor that time – possibly over $100 – into your budget. STEP 5: OVERDUBBING Some may consider this step to be part of tracking. I like to list it separately, so you’re prepared. Overdubs are where a musician plays a part that he or she was unable to play during his or her first run-through of the song. For example, your guitarist may want to record a song from start to finish and play the rhythm guitar part where the guitar solo will be, and then record the solo by itself during a separate take. Another example is if your lead vocalist is also singing back up vocals – he or she would sing the lead vocal first, then listen to that lead vocal while recording the backing vocal part. STEP 6: EDITING (ALLOW 2+ HOURS PER SONG) Editing is a phase of the recording process that many first-time recording artists didn’t anticipate. Sometimes, a recording process can bounce back and forth between steps 5 and 6, depending on the recording engineer’s workflow. And, while the process of editing isn’t very painful for the musicians, it can chew up hours and add to your total cost of recording. It’s not uncommon for editing to take two or more hours per song. So, it’s important to be financially prepared for editing. Common tasks done during editing include:
STEP 7: MIXING (ALLOW 3-10 HOURS PER SONG) Mixing is the process of taking all the instruments and voices and blending them in a sonically pleasing way. This includes not just volume adjustments, but also how strongly each instrument or voice is heard in each ear/speaker (called “panning”). The mixing step also involves applying effects processing – like EQ, compression, reverb, delay, and other special effects – to the mix. In my experience, I’ve seen songs require between three and 10 hours per song to mix. Ask your recording engineer what is typical for him or her for a band like yours. STEP 8: MASTERING Mastering is a step that surprises a lot of new recording artists. “You mean there’s something else I need done after my album’s been mixed?” Yes. Yes, there is. Mastering is the final – and critically important – process in getting your recorded music to sound as professional as possible. It also puts your music in a format that meets the technical requirements for radio airplay, streaming on services like Spotify, and CD manufacturing. You should expect your recording to sound better once mastered. When done well, mastering will:
It’s also important to know what mastering does not do. It does not fix a bad mix – if your vocals are totally buried and you can’t hear what your singer is singing, that’s a mix problem and something that mastering is not designed to address. If there are noises in your mix, mastering won’t take them away. So, if you’re unhappy with a mix, don’t send it to mastering with the hopes that everything you hate about your mix will disappear. Professional mastering will help your mix sound even better. But, it’s not a cure-all for a bad mix or a miracle. One last point on mastering…Mastering should not be done by your mix engineer, even if that mix engineer “claims” to be able to master music. Here’s why not:
STEP 9: DISTRIBUTION After mastering, you will have the files you need to get your music out into the world! There are many services out there who have a web-based process where you upload your music, fill out some info, pay a small fee and they will distribute your music to Spotify, Apple Music, Amazon and all the other streaming platforms and digital download sites. These include CD Baby, Distrokid and others. Bandcamp allows you to sell digital downloads right on their site. There are other services, like Discmakers, that can duplicate your CD’s, vinyl, USB drives, etc. and package digital distribution in. See what’s out there, ask some friends, and choose which service feels like it fits your needs best. Fortunately, there are a lot of good services to choose from! GOOD LUCK Well, these 9 steps have covered how you take an idea and eventually get it released as a song. Was this process more involved than you thought? For most newer recording artists, it is. But, now that you know many of the fine details involved, you are better prepared to get your music out there in a time frame, within a budget, and with a quality production that meets your expectations! Good luck and please do keep Before and After Music Group in mind for your mastering needs! |
AuthorChip Dominick is the CEO and head mastering engineer for Before and After Music Group Archives
June 2023
Categories
All
|
 RSS Feed