
 Musicians recording their first song or album have a certain expectation. They expect to walk into a recording studio with nothing and leave with everything they need to distribute their music.
The one process that they are often surprised to need is mastering. They didn't know that they needed it. And their mix sounds good being played through the studio's ultra-high quality speakers. So, what can mastering really do? These musicians often don't know. And, they'll say to their recording/mixing engineer: "Ain't that something you can do for us?" Some recording/mixing engineers will do the "mastering" for these clients, even though they don't have true mastering software and tools, aren't specialists in the mastering process, and - having spent eight to 10 or more hours per song on recording and mixing - don't really have any additional sonic ideas to bring to the table. Other recording/mixing engineers know that their work will actually sound even better if the music was professionally mastered, and will refer their clients to a mastering studio, like Before and After Music Group. Still, every recording artist should know what to expect from music mastering. After all, it costs a little bit of money and has the potentially to really improve the sound of the recording. So, here is a little bit about what you can expect from pro music mastering. Is Mastering Just About Getting Technically-Required Files? A conversation may go like this... Musician: "Is this what I submit to get my music on Spotify and Apple Music?" Mixing Engineer: "No, you'll need to submit your mastered files." Musician: "Crap. I didn't know that. Is that something you can do for us?" Mixing Engineer: "Well, I don't really have mastering software or much experience. But, I can try to do it with Pro Tools." Musician: "Yeah, do that. I don't want to have to go to another studio." Mixing Engineer: "Well, you don't have to be there for mastering. Most places just accept mixed files online and have you download the final files." Musician: "Eh, do it anyway." This conversation clearly illustrates that the musician thinks that all mastering is about is getting technically-required files as if it was like converting a WAV file into an MP3 file. While mastering does culminate is you getting your music in certain file formats, it's about way more than simply encoding data. Mastering is about making improvements to the sound of your recorded music! Is Mastering Just About Making My Mix Louder? Some musicians know that mastering can make a difference to their mix. But, a common misconception is that mastering merely makes mixes louder. Like getting music into a technically-required format, some musicians think that mastering is just about getting mixes to a technically-required or "competitive" volume. That's not true either. Yes, mastering does bring up the volume of recorded music. But that, too, is just one part of mastering. I'll say it again: "Mastering is about making improvements to the sound of your recorded music!" How Does Pro Mastering Make My Music Sound Better? Notice the use of the word "pro" in this heading. It's there for a reason. Mastering done by an inexperienced person in software not designed specifically for mastering (like Pro Tools) probably will not make your music sound better. But "pro" mastering - mastering done by a mastering specialist who uses tools designed specifically for mastering - will make your music sound better. These are the improvements you should expect:
What Does It Mean to Have My Tonal Balance Optimized? Optimizing the tonal balance of a mix is perhaps where mastering makes its biggest contribution. On an average recording, a pro mastering studio will be able to expand the frequencies you can hear in your music. The highs (like cymbals) will be cleaner, crisper and more audible. The low end will be bigger. The muddy frequencies will be cut, making the entire recording sound closer and clearer. And any harsh frequencies will be attenuated, keeping your music from sounding noisy, even at higher volumes. Now, sometimes, a mix comes in with too big of a low end, making it sound ridiculous in comparison with national releases. Other times, a mix comes in with too much emphasis on the high frequencies, making the recording sound thin. Obviously, a mastering engineer isn't going to boost anything that's already excessive, so s/he will adjust those frequency ranges so they are just the right proportions, perfectly balanced. Every project is different. And a mastering professional will treat every project that way, closely listening for the opportunities to improve the sound of the music. When I master a mix, I commit myself to finding at least one improvement opportunity. And I usually find more than one. Now That You Know... I hope that this post has helped you better understand what to expect when you need to get your music mastered. And, I hope that you'll consider having us at Before and After Music Group master your music. We'd be so delighted to be your source for mastering services and to help your music reach its potential! Contact us at 412-600-8241 (text or phone are fine) or beforeandaftermusicgroup@gmail.com.
0 Comments
 Back when my band and I were recording the Chip DiMonick "Not Yet Rated" album in 2007, the recording engineer/owner of the recording studio asked us, "Where are you guys getting this album mastered?"
Huh? Our album needs to be mastered? What's that? And don't you do that here? Those are among the questions that flooded into our heads. (This was years before I did any music production/recording/mastering myself) It was a decision we weren't prepared for. So, we asked the engineer who he'd recommend. He recommended a guy in Chicago. Upon investigating the guy's website, it sounded like he specialized in mastering for vinyl records. And, in 2007, we had no interest in doing a vinyl pressing of our album. But, if our recording engineer had experience with him, we figured it would work out OK. We didn't really know what mastering did, so we didn't know who else might be better. Well, we started learning about mastering soon thereafter. After we sent in our unmastered recordings, we got back our mastered recordings. Something was very weird. On the songs we tuned down to C# on, we couldn't hear the low C#'s. "Is this even possible or are our ears playing tricks on us?" we wondered. I called the mastering engineer. He said that, because of the reference track we sent him - "Dead" by My Chemical Romance - he thought we'd want that C# eliminated so he cut that frequency. Still to this day, I have no idea why he would have thought this was a good idea. But he could restore it in a revision. And he did. The C# was back, but we still didn't exactly know how to evaluate how good the mastering was. Being 2007, this was during the peak of what was called "the loudness war," where mastering engineers competed almost exclusively on how loud they could make a recording. So, we put the master CD in back-to-back with our friends' CD. Theirs was louder. So, we asked the mastering engineer to make ours louder. He did. Without advising us what we'd be sacrificing in quality for loudness. But, not really knowing anything about mastering other than it can affect volume and take notes/frequencies right out of your songs, we were "satisfied." In hindsight, we could have done so better. The decision on who to master our album was ours. But, we were unprepared for it and were willing to blindly choose a mastering engineer just based on our recording engineer's recommendation (which could have been based on a kickback for all we knew). It's a regret. It's not 2007 anymore. The loudness war has been over for years. Streaming allows you to evaluate virtually unlimited examples of independently produced music. Yet, musicians STILL treat the mastering decision with the same ignorance and apathy as we did back then. In my post from a couple of weeks ago, I wrote that "because mastering is the last thing done to improve the sound of your music...it is a process that you should take seriously." I wish I someone gave me that advice 15 years ago. Careful consideration isn't just necessary when your recording engineer suggests a mastering studio. It's also necessary when your recording engineer suggests doing your mastering himself/herself, which is a topic all unto itself! I'll post on that in the near future. But, if you have the knowledge that mastering is a separate and necessary part of music production and the insight to know that you should choose the best mastering studio for your needs, we'd appreciate you considering Before and After Music Group's mastering services. Email us at beforeandaftermusicgroup@gmail.com or call/text us at 412-600-8241. 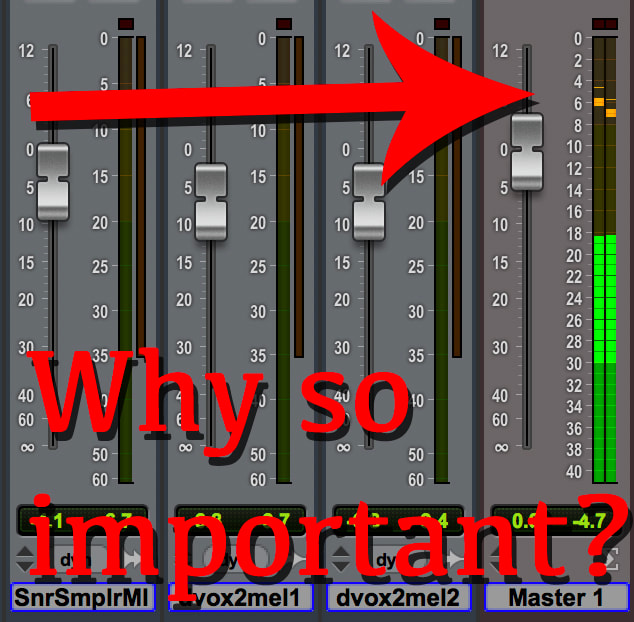 As I wrote in my post "9 Steps for Releasing Your Music," mastering is "the final – and critically important – process in getting your recorded music to sound as professional as possible." It is preceded by mixing, which is preceded by editing, which is preceded by overdubbing, which is preceded by tracking.
So, it's natural to think that selecting a mastering studio doesn't need to be done until you are done mixing, or close to it. But, it's actually not smart to wait that long. And the reason isn't obvious unless you know a little technical tidbit about recording. Fortunately, that technical tidbit is relatively easy to understand, even if you're not an audio professional. So, here goes... Mastering studios will have preferred or required characteristics of mixes that help them make the greatest improvement in your music. One of those is "headroom." In digital recording, you have meters that show the volume of each vocal or instrument channel. You also have a single meter showing the volume of the mix - where all instruments are combined into a stereo channel representing left and right speakers. The channel for this meter is called the "master bus." These meters generally light up green (from the bottom to the middle of the meter and denoting acceptable volume), yellow (from the upper-middle to the near-top of the meter and denoting closeness to too loud), and red (the top of the meter and denoting definitively too loud). When a meter hits red in a digital recording, there is an unpleasant sound, kind of like a click, which is called "clipping." There are numbers alongside the meter which rise from negative numbers to 0. The point where clipping occurs is 0dBFS, which means 0 decibels full scale. You always want every channel and the master bus below 0dBFS. The distance between the loudest part of a signal during a song - the "peak" - and 0dBFS is called headroom. Most mastering studios will ask for a certain amount of headroom. For example, we - Before and After Music Group - ask for 3-6 dB of headroom. This means that the loudest part of your song should ideally not rise above -6dB on your studio's master bus and definitely not rise above -3dB on your studio's master bus. If you're curious why headroom is needed, it's to ensure that clipping is avoided in mastering, too. When a mastering engineer makes improvements to your recording - like boosting frequencies to give a recording more nationally-competitive bottom end or simply raising the overall volume of your recording after compressing it to an optimal dynamic range - that can push a recording closer to clipping. The more headroom we mastering engineers have to work with, the more improvements we can make without being slaves to the possibility of clipping. Still unsure what that has to do with selecting a mastering studio early? Well, when recording engineers begin a mix, they should have the target levels in mind. For example, I start mixing by dialing in the drums. If I know I have to leave 6dB of headroom, I will set levels for the drums so that - when soloed - they peak at around -11dB on the master bus. I know from experience that adding the other instruments in a standard rock song will add another 5-ish dB to the mix volume. So, when I have dialed everything else in, my mix should peak around -6dB. Some experienced recording and mixing engineers even "mix as they go." This means that, once the drums are tracked, they will set their faders to peak at a certain level so they are kind of "partially mixed" as other instruments are being recording on top of them. Therefore, it can be extremely helpful for your mixing engineer to know this before beginning a mix or, possibly, even beginning recording. If the mixing engineer doesn't know this up-front, s/he might complete an entire mix only to later learn that it doesn't jive well with the mastering studio's specs and that could result in more work to be done. For you, the musician, the client, that could mean more money spent unnecessarily. Don't let that happen. Decide on your mastering studio early. Get their specs. Share those specs with your mixing engineer before the mix begins. And let your mastering studio do the best job it can with improving the sound of your recording thanks to having a mix prepared ideally for them. Before and After Music Group would love to be selected as your mastering studio. If you want to ask us questions about mastering or get some guidance on how to navigate the music production process to get the best sounding final product for your music, contact us at beforeandaftermusicgroup@gmail.com or 412-600-8241. 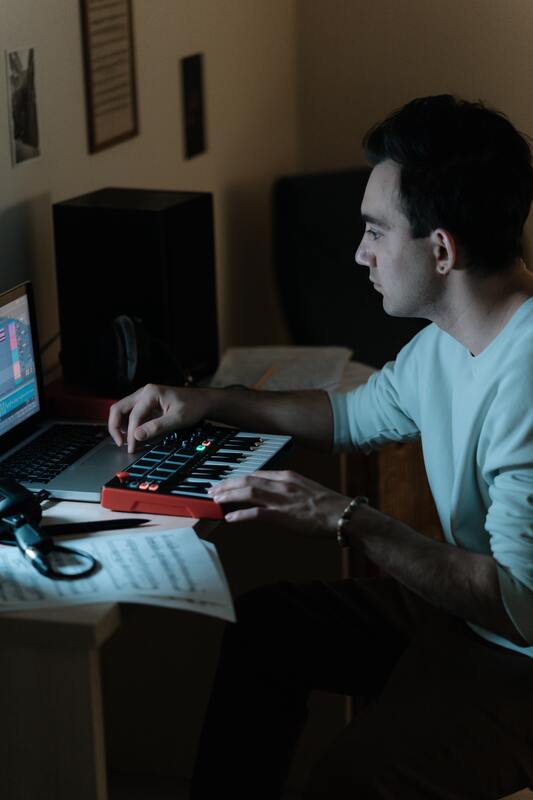 The COVID-19 pandemic and its associated lockdowns that began in 2020 brought about several shifts in the music industry. One of those was referred to as a "home recording boom" by the Economist. Unable to play live and, in many cases, unwilling to get together with other musicians or recording specialists, musical artists began exploring recording at home in unprecedented numbers.
This movement was largely forced on us by the public health crisis. But, it was facilitated largely by decades-long trends in the recording industry that saw recording software become more powerful, more compatible and more affordable than ever. That doesn't mean that every musician who recorded at home produced great sounding tracks that rivaled the quality of the biggest and best studios with the most experienced engineers. In reality, it's probably safe to say that most of the recordings produced by first-timers were pretty bad. But, it's probably not a stretch to say that some musicians learned quickly and, with an innate knack for it, were able to produce some music that sounded good when reduced to a recording. Pre-COVID-19, musical artists usually engaged two audio professionals to get their music into radio-ready shape: a recording engineer and a mastering engineer. So, does the trend towards home recording make these two professionals endangered species? Not exactly. You see, there are several very specialized processes that happen between writing a song and having it prepared for radio airplay, streaming and/or CD production. As I wrote in a previous post entitled "9 Steps for Releasing Your Music," those include tracking, overdubbing, editing, mixing and mastering. Each involves its own skill set. So, you could start from the beginning and hand your project over to a professional once you no longer have the skill set required to produce the quality you want at the step that you get to. But, let's just say that you want to do as much as possible yourself. Maybe you want to spend as little money as you can. Should you have a home recording mastered? Before I answer, let me make sure we are on the same page in defining a "home recording." By "home recording," I do not mean a live, one-take recording of a full band on an iPhone. I am talking about a multi-track recording done on a Digital Audio Workstation (DAW) such as Pro Tools, Cubase, Logic or, hell, even Audacity. I would say that you should probably not bother getting an iPhone recording mastered. It's unlikely that any mastering services will be able to whip a phone recording into radio-ready shape. However, if we're talking a multi-track recording on a legit DAW, I would absolutely recommend having mastering done by an experienced specialist. Here's why... Most songs you hear on the radio will have had at least two top-level professionals involved in the production of them: that recording engineer and mastering engineer. If you've recorded your own music - and assuming that you haven't been in the business of recording other people's music daily over a period of years - you've already cut one of those professionals out of your recording. Your recording is already unlikely to sound as good as it would have if you had gone to a pro studio. But, sending the tracks you've recorded out to a professional mastering studio allows you to at least have one of those professionals involved in getting your music in the ballpark of its sonic potential. And professionally-done mastering can sometimes have a bigger impact on a mediocre recording than it can on a phenomenal recording. A phenomenal recording may already have its instruments so perfectly EQ'd and compressed that the mix sounds tonally balanced and dynamically smooth. Mastering can certainly improve upon that. But, if a mix has some notable deficiencies compared to major label releases, mastering can close those bigger gaps to a greater extent. I get it, recording at home can save a lot of money. When I've recorded in other professionals' studios, I've paid around $450ish per song for the tracking/overdubbing/editing/mixing aspects. And I've paid $50-$150 per song for mastering. So, if you choose just to have professional mastering done, it's a smaller proportion of the overall expenses that you are choosing to pay. If you are considering having your home recording mastered, please keep Before and After Music Group in mind. We would love to help your music reach its sonic potential. Contact us at beforeandaftermusicgroup@gmail.com or +1-412-600-8241 and let's discuss your project!  Now that I've been a musician specializing in mastering for a while, I've noticed something concerning about my musician peers...Most have no idea how much good mastering can do for the sonic quality of their final recording.
One common misunderstanding is that mastering simply is the technical encoding of music files so you can send them off to streaming or CD production or radio stations. Well, let me dispel that myth...mastering is so much more! When performed as an art form, mastering will make your music sound better. Because of this - and because mastering is the last thing done to improve the sound of your music - it is a process that you should take seriously. That means putting the right effort, attention and care into who it is that masters your music. Too often, mastering choices are considered an afterthought in a music release plan. "I'll just have my recording/mix engineer master it 'cause it's convenient" or "I'll get that online mastering done" or "I heard about a guy that does mastering cheap" are sentiments that are too common among people who should be caring about having the best sounding album or single possible. So, to give you an appreciation for how a serious mastering engineer (i.e., me) treats your music with TLC and can give you a better sound than your mix engineer or the online service or that "guy who does mastering cheap," I will explain what I do in my mastering studio. The first thing I do is listen to a nationally-released reference track. I always ask clients to provide the name of a song, released in the past five years, that is in a similar style to theirs and that they find sonically pleasing. Because if they know and like a song that's sonically pleasing to them and I can make their song sound similarly good, I know I will have a happy client - there is a clear target and I aim to hit it in the bullseye! After listening to the track, I then listen to the client's unmastered mix. As you might expect, there are usually huge gaps between a national, mastered release and a locally-recorded, unmastered track. Many of these gaps are simply natural gaps between unmastered and mastered music. However, being the music junkie that I am, often these gaps include opportunities that I hear that the mix engineer didn't hear. Other times, they include outright deficiencies in the mix engineer's work that I have the capability of correcting. My job at that point is to identify all of the gaps and come up with a game plan to close those gaps. While mastering isn't designed to change the volume of individual instruments in a recording - that's a job done in mixing - my mastering tools do allow me to boost and cut frequencies such that some instruments that occupy very specific frequency ranges can sit better in the mix. So, if I am hearing some blindspots in the mixing engineer's work compared to the nationally-released song, I will start my work by trying to get the instruments to sit in the same ballpark as the nationally-released song. Then, I will adjust the overall tonal frequency of the music. Sometimes, there's not enough bottom end. Sometimes, there's too much. The same may be true of high end. And, sometimes, there is a muddiness that can be removed. This frequency adjustment process goes a long way in improving the sound of the music. After that, I will listen to the music softly. And loudly. And in-between. While I am doing so, I am listening for any harsh frequencies that seem to degrade the quality of the music. Have you ever listened to a song loudly for the first time after listening at normal volume for a while and it sounds kinda bad? Almost like there is static over top of the music? Those are harsh frequencies that are present at an unnatural volume in a recording. With the laser-like precision of a surgeon I search for them. I find them. And I take them out of your recording. Have you ever noticed that, in national recordings, no instrument, voice or part of a song jumps out at you and shocks your ears like may happen if you were watching a live band? Mastering is responsible for that. Good mastering will give your music that same dynamic smoothness as the songs you hear on the radio. Often - but not always - the last step is to give your music volume that is competitive with national releases and consistent from track-to-track if you're recording an album and not just a single. This is also a process that requires laser-like precision. I gradually increase the volume of your track until my tuned-in ears notice a degradation of quality. Just about every recording has a point where, if you turn up the volume any louder, unpleasant distortion will rear its ugly head. I find that point and bring the volume of your recording just below it. I always want my clients to have a loud recording, but not one where quality is sacrificed at all. Now, I mentioned that carefully pumping up the volume is not always the last step of mastering. That's because, in certain circumstances, there is a "coating" that mastering engineers can apply to a recording that enhances the sound. For example, one client had me master a song that they felt was similar to a Sharon Jones and the Dap-Kings song. However, in a conversation, they also mentioned that they were more of an "old school Motown" type of a band. So, I did two versions of a mastered song for them with one difference in one setting: I mastered a modern version a la Sharon Jones and a version on which I applied a "vintage" effect. They ended up liking the vintage treatment better. Effects aren't always part of the mastering process, but they can be when a certain sound is sought that "coats" the entire song. So, that is my process. It takes around an hour-and-a-half per song and, as you may imagine from reading this post, a good bit of time is spent carefully listening in order to make the best decisions. If I make the right decisions, your music will sound noticeably better when I'm done with it. I recognize that your music came from your heart. It is your baby. And my goal as your mastering engineer is to treat your baby with the TLC it deserves. So, hopefully, now you know more about mastering than the average musician. It has more impact on music than an amateur musician may realize! If you're interested in having me master your music with this type of care and attention, email me (Chip) at beforeandaftermusicgroup@gmail.com or call/text me at 412-600-8241.  If you're planning on recording and releasing your music, mastering is a required step in the process. Too often, musicians don't put enough effort into understanding what mastering really is and how much influence it has over the quality of recorded music.
So, here are 6 mastering fun facts to help you begin to understand mastering. Of course, Before and After Music Group would love the opportunity to master your music. So, contact us at beforeandaftermusicgroup@gmail.com if you are seeking a mastering studio to help your music reach its potential!
“We’re gonna release an album this year!”
How many bands say this? It has to be millions, right? And how many of those bands have all of the steps of their album release planned out in advance? I’d guess a very small percentage. But it shouldn’t be that way. It doesn’t have to be that way. Knowing what the steps are in the music release process and planning them have tremendous benefits for a band, including:
STEP 1: SONGWRITING (& REWRITING) Obviously, before you record music, you have to create it. To many bands, writing a song is something that is done in one session. And, undoubtedly, many hits throughout the years were recorded where the melody, lyrics, music, etc. were exactly the same as first day the songs came into existence. But, for most songs, there is room for improvement after the first day. What’s the best part of your song? Maybe it’s the riff. Maybe it’s the chorus. Maybe it’s the opening line. What can you do to make every part of the song that good? There’s probably something you can improve. So, don’t think of songwriting as an activity that takes place in one hour then you’re done. Allow yourself time to craft your song. To challenge yourself to make it just a little bit – or a lot – better. Don’t rush the songwriting process. Allow yourself time to make each song the best it can be. STEP 2: REHEARSING When musicians think of releasing music, their thoughts will drift to the recording studio. Ah, isn’t it alluring to think of being in a studio, surrounded by gear that is too complicated for you to understand, and being on the precipice of making history? Sure. The studio is a place to make history. It is not a place to figure out what you are going to sing or play! Studio time can be expensive – $60, $75 or even more per hour. So, you want to make efficient use of your time. Figuring out the notes you sing on a part or how you will play a guitar solo is not something you want to be doing while the proverbial meter is running. Know what you’re going to sing or play once it’s your turn in the studio’s live room or isolation booth. Rehearse your parts so that they are so second nature that you’re likely to nail them perfectly in just one or two takes. Then, the time you spend in the studio will simply be executing what you’ve prepared. It’s expensive to do it any other way. Not to mention that the results could be disappointing if you don’t go in prepared to kill it. STEP 3: PRE-PRODUCTION Pre-production is kind of a mysterious term. That’s because only professional musical artists and serious amateurs do it. If you want to be serious about getting the best recording you can, you should include pre-production activities as part of your music release process. Pre-production involves all activities associated with tying up all loose ends prior to going into the studio. It’s when you make sure that your songs and your musicians are ready for the tracking step. Ideally, the pre-production step will end with you having a home demo of your songs. Here are a sample of some of the things you should hope to accomplish in pre-production.
STEP 4: TRACKING (ALLOW 2+ HOURS PER SONG + SETUP TIME) At this point, you are in the studio. Finally! The tracking phase is where each musician – sometimes simultaneously, often individually – records his or her primary part of each song. If you engaged in pre-production activities, not much should be a surprise here, but merely a matter of execution. If you did not engage in pre-production activities, there may be many surprises. One key thing to be prepared for is that, if you have a good engineer/producer tracking your project, you can expect feedback on your performance as you track. Maybe the engineer heard a vocal line that was delivered with too little confidence, or a guitar part that had some string noise, or a drum fill where the rim of the drum was hit, or some other subtle imperfection. A good engineer will ask you to re-record your parts when he or she feels you can do better. That’s OK. No need to get frustrated. The more takes you do, the more likely you will end up with one that’s perfect. That’s important. You will have to live with your best take for the rest of your life, so it’s good to have multiple takes from which to choose! Finally, be aware that you don’t have to do a whole take from the start of a song until the end. You can “punch in” to fix errors in the middle of a song while keeping the good parts of your take. The amount of time it takes to track a song varies tremendously based on the number of instruments and voices involved and how many takes each musician requires to nail their parts. Don’t be surprised if it takes each musician a half-hour or more per instrument/voice per song to track a song. Also, don’t be surprised if it takes two hours to load in and mic the drum set. Depending on the studio, you may be charged for this time. If the studio charges, factor that time – possibly over $100 – into your budget. STEP 5: OVERDUBBING Some may consider this step to be part of tracking. I like to list it separately, so you’re prepared. Overdubs are where a musician plays a part that he or she was unable to play during his or her first run-through of the song. For example, your guitarist may want to record a song from start to finish and play the rhythm guitar part where the guitar solo will be, and then record the solo by itself during a separate take. Another example is if your lead vocalist is also singing back up vocals – he or she would sing the lead vocal first, then listen to that lead vocal while recording the backing vocal part. STEP 6: EDITING (ALLOW 2+ HOURS PER SONG) Editing is a phase of the recording process that many first-time recording artists didn’t anticipate. Sometimes, a recording process can bounce back and forth between steps 5 and 6, depending on the recording engineer’s workflow. And, while the process of editing isn’t very painful for the musicians, it can chew up hours and add to your total cost of recording. It’s not uncommon for editing to take two or more hours per song. So, it’s important to be financially prepared for editing. Common tasks done during editing include:
STEP 7: MIXING (ALLOW 3-10 HOURS PER SONG) Mixing is the process of taking all the instruments and voices and blending them in a sonically pleasing way. This includes not just volume adjustments, but also how strongly each instrument or voice is heard in each ear/speaker (called “panning”). The mixing step also involves applying effects processing – like EQ, compression, reverb, delay, and other special effects – to the mix. In my experience, I’ve seen songs require between three and 10 hours per song to mix. Ask your recording engineer what is typical for him or her for a band like yours. STEP 8: MASTERING Mastering is a step that surprises a lot of new recording artists. “You mean there’s something else I need done after my album’s been mixed?” Yes. Yes, there is. Mastering is the final – and critically important – process in getting your recorded music to sound as professional as possible. It also puts your music in a format that meets the technical requirements for radio airplay, streaming on services like Spotify, and CD manufacturing. You should expect your recording to sound better once mastered. When done well, mastering will:
It’s also important to know what mastering does not do. It does not fix a bad mix – if your vocals are totally buried and you can’t hear what your singer is singing, that’s a mix problem and something that mastering is not designed to address. If there are noises in your mix, mastering won’t take them away. So, if you’re unhappy with a mix, don’t send it to mastering with the hopes that everything you hate about your mix will disappear. Professional mastering will help your mix sound even better. But, it’s not a cure-all for a bad mix or a miracle. One last point on mastering…Mastering should not be done by your mix engineer, even if that mix engineer “claims” to be able to master music. Here’s why not:
STEP 9: DISTRIBUTION After mastering, you will have the files you need to get your music out into the world! There are many services out there who have a web-based process where you upload your music, fill out some info, pay a small fee and they will distribute your music to Spotify, Apple Music, Amazon and all the other streaming platforms and digital download sites. These include CD Baby, Distrokid and others. Bandcamp allows you to sell digital downloads right on their site. There are other services, like Discmakers, that can duplicate your CD’s, vinyl, USB drives, etc. and package digital distribution in. See what’s out there, ask some friends, and choose which service feels like it fits your needs best. Fortunately, there are a lot of good services to choose from! GOOD LUCK Well, these 9 steps have covered how you take an idea and eventually get it released as a song. Was this process more involved than you thought? For most newer recording artists, it is. But, now that you know many of the fine details involved, you are better prepared to get your music out there in a time frame, within a budget, and with a quality production that meets your expectations! Good luck and please do keep Before and After Music Group in mind for your mastering needs! |
AuthorChip Dominick is the CEO and head mastering engineer for Before and After Music Group Archives
November 2022
Categories
All
|
 RSS Feed